|
The Branch Location master file contains the list of branches of the company. This is usually used if the company is required to have separate books of accounts for the Head Office and its branches.
Step-by-step instructions:
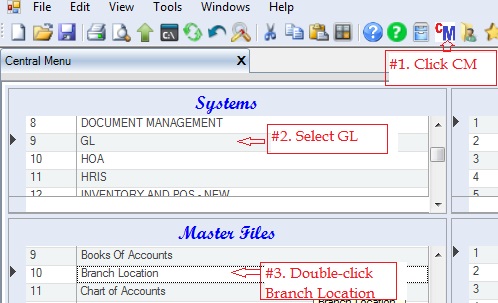
1. Open Cenral Menu. Your Central Menu maybe different from the screenshot below as each user can have different menu and access rights.
2. Select System->GL
3. Double-click Master Files -> Branch Location You will be redirected to Bank Account tab window.
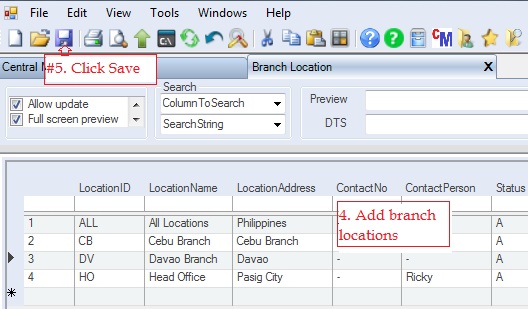
4. Add company branches. The following columns must be filled up properly.
•LocationID refers to the ID location which is usaully the acronym of the location. Ex: HO for Head Office, CB for Cebu Branch.
•Location Name refers to the name of the branch. Ex: Cebu Branch
•Location Address refers to the complete address of the branch
•Contract No and Contract Person. These columns are optional only.
•Status. A=Active; I=Inactive. Accounts marked Inactive will not be show on the lookup table. So if you want an account not be used anymore in the journal entry, mark it Inactive.
5. Click Save. You can update this file from time to time.
|