|
This module is integrated with the GL System -> Journal Entries. It can retrieve all the sawt transactions recorded under the Subsdiary Ledger table via DTS. You can also use it without the GL system, just encode the data manually or use copy/paste if you have excel copy of your sawt entries.. You must encode only those withholding taxes supported by 2307 given by the customers.
Features:
1. SAWT Alphalist Summary
2. DAT file generation for eSubmission
Step-by-step instructions:
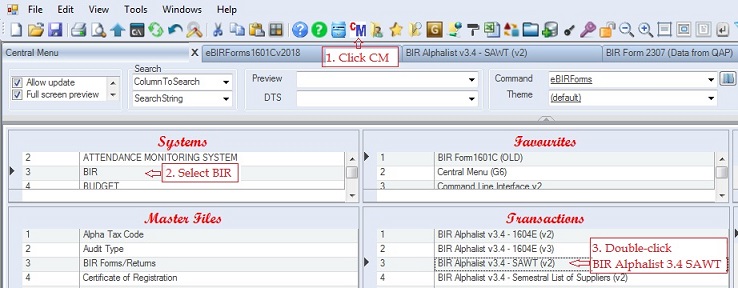
1. Click Cemtral Menu.
2. Select Systems -> BIR
3. Double-click Transactions ->BIR Alphalist v3.4 - SAWT (v2). You will be redirected to BIR Alphalist v3.4 - SAWT (v2) tab window.
To retrieve data from the GL system
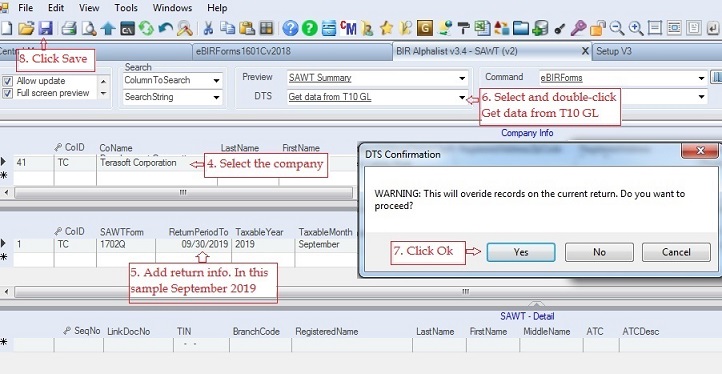
4. Select the company under the Company grid. If the company is not yet encoded, enter the company information using the Taxpayer Information master file. BIR does not allow special characters such as , ' + &*, avoid using these characters when entering data for BIR modules. The main Company Master File allows special character and so to avoid these special characters, a new database table named bir_Company is created.
5. Add BIR Return Info. Fill-up all the necessary columns .
6. Select and double-click DTS -> Get data from T10 GL
7. Click Yes to retrieve the data. Review the generated data against the actual 2307.
If you are not using the GL system, you can manually encode the data based on the 2307 given by the customers..
8. Click Save.
To print the SAWT Summary.
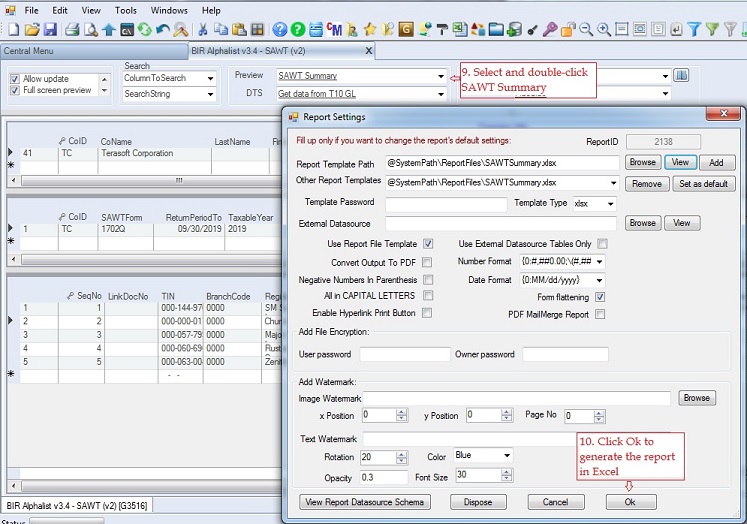
9. Select and double click Preview -> SAWT Summary
10. Click Ok, the SAWT Summary report will be generated and exported to excel.
To generate the SLSP Dat Files
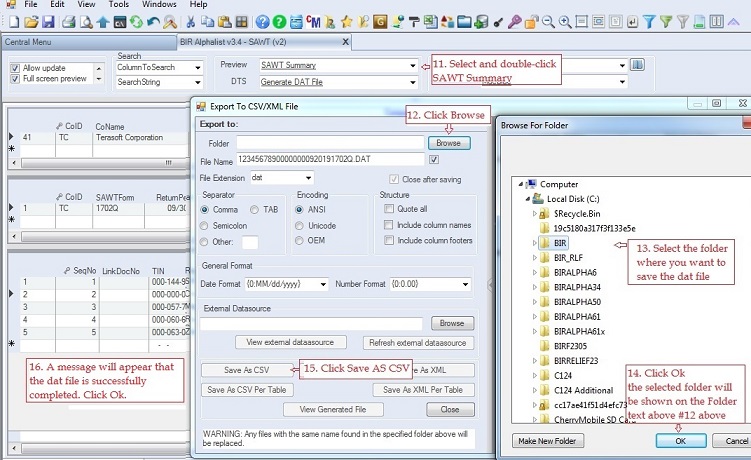
11. Select and double-click Generate DAT File. Export to CSV/XML file pop-up window will appear
12. Click Browse. A Browse For Folder pop-up window will appear.
13. Select the folder where you want to save the dat file (in the sample below, DatFiles-VAT2019 folder). You may create a descriptive folder like DatFiles-VAT2019. During validation and esubmission this is where you will locate the dat files.
14. Click Ok
15. Click Save As CSV.
16. Message will appear if the dat file is successfully completed. Click Ok
|